Want to bake like a pro? This guide covers everything you need to know about pastry and baking basics. From tools to dough types, techniques, and recipes, you’ll learn how to achieve bakery-quality results at home or advance your baking career. Here’s what you’ll find:
- Essential Tools: Must-haves like digital scales, nonstick pans, and silicone mats.
- Dough Types: Shortcrust, puff pastry, choux, enriched, and yeast-leavened doughs explained.
- Key Techniques: Creaming, kneading, folding, and precision in measurements.
- Recipes: Step-by-step guides for tarts, bread, and simple pastries.
- Baking Science: Understanding leavening agents, oven heat, and ingredient functions.
- Resources: Recommended books, online classes, and tips for recipe conversions.
Quick Comparison of Dough Types
| Dough Type | Key Characteristics | Best Used For | Texture |
|---|---|---|---|
| Shortcrust | Cold fat, minimal mixing | Pies, tarts, quiches | Brittle, tender |
| Puff Pastry | Laminated butter layers | Croissants, pastries | Light, flaky |
| Choux | Steam-leavened, double-cooked | Éclairs, cream puffs | Hollow, crispy |
| Enriched | High fat and sugar content | Brioche, sweet breads | Rich, tender |
| Yeast-Leavened | Fermentation for lift | Bread, pizza dough | Chewy, airy |
Ready to elevate your baking? Dive in to explore tools, techniques, and recipes that will transform your skills.
Basic Baking Techniques Every Beginner Should Know!
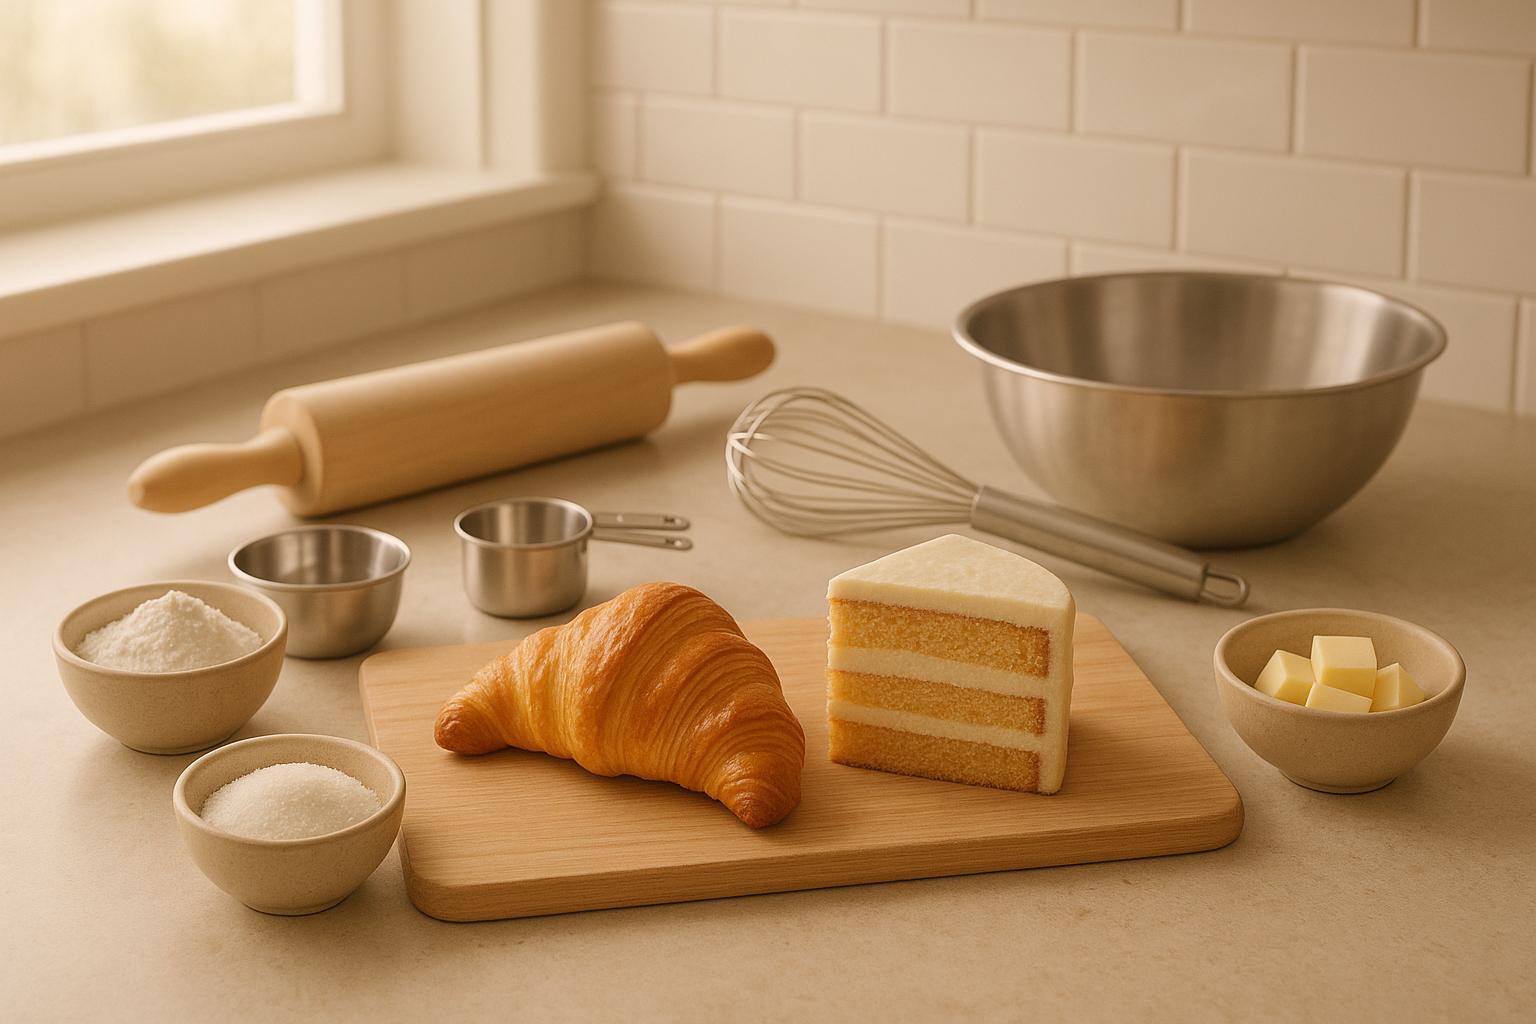
Basic Baking Tools and Equipment
Starting your baking journey with the right tools can make all the difference. While you don’t need to buy everything at once, investing in high-quality basics will set you up for consistent, professional results from day one.
Must-Have Tools for Every Baker
Measuring Tools: The Key to Precision
Accurate measurements are the backbone of successful baking. A digital kitchen scale, like the Escali Primo ($27), ensures precise weight-based measurements, which can drastically improve consistency. For volume measurements, the Hudson Essentials Premium Stainless Steel Measuring Cups ($30) are a durable option with clear, permanent markings. These are perfect for small quantities of ingredients like vanilla extract or baking powder.
Baking Pans and Sheets You Can Rely On
The USA Pan Nonstick Muffin Pan ($32) delivers even heat distribution and effortless release. Rimmed baking sheets are versatile for cookies and roasting, while cookie sheets promote even browning. For pies, the Pyrex 9-Inch Glass Pie Plate ($12) is a favorite, thanks to its ability to prevent soggy crusts and its multi-purpose design.
Mixing and Handling Tools
The GIR Premium Stainless Steel Whisk ($13) is excellent for aerating batters, while a silicone spatula is perfect for folding and scraping bowls. Uniform cookies are a breeze with the OXO Good Grips Cookie Scoop ($17). For rolling dough, the J.K. Adams Dowel Rolling Pin ($32) offers a simple, ergonomic design that’s easy to store.
Specialty Tools That Elevate Your Baking
An Ateco Ultra Offset Spatula ($9) makes leveling cake batters and frosting a breeze. To ensure your oven’s temperature is accurate, the Rubbermaid Stainless Steel Oven Thermometer ($10) is a must-have. For a reusable alternative to parchment paper, the Kitzini Silicone Baking Mats ($30) are a practical and eco-friendly option.
How to Choose Quality Tools
The materials your tools are made from directly impact their performance and durability. Heavy-gauge or aluminized steel bakeware ensures even heat distribution, reducing the risk of burnt edges. For example, the Circulon Momentum loaf tin earned top marks for its sturdiness, ease of cleaning, and reliable results.
When it comes to measuring tools, stainless steel or durable plastic options resist warping and staining better than cheaper alternatives. Glass measuring cups are ideal for liquids, as they allow you to see the level clearly. For mixing bowls, non-slip bottoms are a helpful feature, keeping them steady during vigorous mixing. Stainless steel bowls are lightweight and durable, while glass bowls have the added benefit of being microwave-safe, perfect for tasks like melting chocolate.
"Every successful baking start-up must know that having a good set of bakeware is the bedrock of a successful baking business."
- Knead & Frost [2]
Your choice of specialty tools should align with your baking interests. If cake decorating is your passion, invest in high-quality piping bags and tips. If bread baking excites you, prioritize tools like a sturdy bench scraper and a sharp bread knife.
Once you’ve chosen your tools, taking care of them is essential for maintaining their performance.
Maintaining and Storing Baking Tools
Proper care helps extend the life of your tools and ensures consistent results. Clean everything immediately after use with warm, soapy water to prevent residue from building up. Use soft sponges or cloths, especially on nonstick surfaces, to avoid damaging delicate coatings. Harsh chemicals and abrasive cleaners should be avoided, and hand washing is often the safest option for nonstick and wooden tools.
Store your tools in a clean, dry space, away from moisture, heat, and direct sunlight. To prevent scratches, place a soft cloth between nonstick pans. Wooden tools, like rolling pins, benefit from occasional treatment with food-grade mineral oil to keep them from cracking. Regularly inspect your tools for damage, such as loose handles or worn coatings, and replace anything that shows significant wear.
Using baking mats or parchment paper can also protect your pans and make cleanup easier, ensuring your bakeware lasts longer.
Understanding Dough Types and Their Uses
The type of dough you use can make or break your baking experience. Each dough brings its own texture and flavor to cakes, pastries, and breads. Knowing these differences helps you choose the right base for your creations and ensures consistent, high-quality results.
Overview of Major Dough Categories
Shortcrust Pastry: A Dessert Staple
Shortcrust pastry is the go-to choice for desserts like apple pies and savory dishes like quiches. Its tender, crumbly texture supports a variety of fillings without getting soggy[5]. The secret lies in using cold fat and working quickly to avoid activating too much gluten. You’ll find two main types: flaky dough, with unevenly distributed fat for layers, and mealy dough, where fat is evenly mixed for a denser, crisp crust – perfect for custard tarts[3].
Puff Pastry: Layers of Precision
Puff pastry is all about layers. By folding butter into the dough multiple times, bakers create a light, crispy texture that’s ideal for croissants, palmiers, and vol-au-vents[5]. The magic happens as steam from the butter separates the layers during baking. This process demands patience and careful temperature control to get it just right.
Choux Pastry: Steam-Driven Elegance
Choux pastry is unique because it’s cooked twice – once on the stovetop and then in the oven. The result? Hollow pastries ready to be filled. Classics like éclairs, profiteroles, and cream puffs rely on steam for their rise, making technique especially important.
Enriched Doughs: Soft and Buttery
Enriched doughs take basic bread dough up a notch by adding milk, sugar, eggs, and butter. This creates a rich, tender texture, as seen in brioche[4]. These doughs often need extra resting time, which enhances both their flavor and workability.
Yeast-Leavened Doughs: Bread’s Backbone
Yeast-leavened doughs rely on fermentation to provide structure and flavor. Lean versions stick to flour, water, salt, and yeast, while richer ones include fats and sugars[4]. Think of staples like basic bread, pizza dough, and focaccia. Fermentation not only makes the dough rise but also adds depth to its taste.
Unleavened Doughs: Simple and Versatile
Unleavened doughs skip leavening agents altogether, making them perfect for thin, flaky creations like pasta, tortillas, and phyllo dough[3]. While phyllo shares some similarities with puff pastry, its layers are created by brushing fat between sheets rather than incorporating it directly into the dough[3].
| Dough Type | Key Characteristics | Best Used For | Texture |
|---|---|---|---|
| Shortcrust | Cold fat, minimal mixing | Pies, tarts, quiches | Brittle, tender |
| Puff Pastry | Laminated butter layers | Croissants, pastries | Light, flaky |
| Choux | Double-cooked, steam-leavened | Éclairs, cream puffs | Hollow, crispy |
| Enriched | High fat and sugar content | Brioche, sweet breads | Rich, tender |
| Yeast-Leavened | Fermentation for lift | Bread, pizza dough | Chewy, airy |
With a better understanding of these dough types, let’s dive into the techniques that will help you work with them effectively.
Mixing, Kneading, and Handling Techniques
Understanding dough is only half the battle – how you handle it is just as critical.
Precision in Measurements and Temperature
Accuracy is key. Using a digital scale ensures consistent results, as flour volume can vary by up to 50%[6]. Dough temperature also matters, especially for yeast-based recipes. For instance, the ideal range for wheat-based breads is 75–78°F[13][14]. Adjust your water temperature based on your kitchen’s conditions:
| Kitchen Temperature | Water Temperature Needed |
|---|---|
| 68°F | 98°F |
| 72°F | 90°F |
| 76°F | 82°F |
| 80°F | 74°F |
Mixing for Success
A systematic approach to mixing is essential for achieving the right dough texture and volume[7]. Start by combining flour and water, then let the mixture rest (known as autolyse) to fully hydrate the flour. Afterward, add salt, sugar, or fats. This resting period shortens mixing time and improves the dough’s elasticity[7].
Kneading: Building Structure
Kneading develops gluten, incorporates air, and ensures even ingredient distribution. Aim for 10–15 minutes of kneading[8]. The method you choose depends on the dough’s hydration level:
- Slap and fold works well for wetter doughs.
- Folding in the bowl is a clean and straightforward option.
- The Rubaud method is ideal for very sticky, high-hydration doughs[7].
Use the windowpane test to check if the gluten is developed. Stretch the dough gently – if it forms a thin, translucent sheet without tearing, you’re good to go.
Adapting to Your Environment
Temperature and humidity play a huge role in how dough behaves. Yeasts thrive around 80°F, while bacteria prefer slightly warmer conditions at 89°F[12]. If you’re working in a warm kitchen, reduce yeast and use cooler water to slow fermentation. In cooler settings, extend proofing times or slightly increase yeast. For humid environments, consider reducing water content; for dry conditions, add a touch more hydration[11].
Avoiding Pitfalls
Overmixing can weaken the dough’s structure, leaving it sticky and loose[10]. Also, keep an eye on temperature during mixing – friction from a stand mixer can raise the dough’s temperature by about 1°C per minute[9]. Add fats like butter or oil only after the gluten has formed to avoid slowing its development. For rustic breads, a less intensive mix works best, while sandwich breads benefit from thorough kneading for a finer crumb[6].
Key Baking Techniques
Once you’ve got the basics of tools and dough down, it’s time to focus on the techniques that elevate your baking. These foundational methods are essential for creating consistent, high-quality results and give you the confidence to tackle a wide variety of recipes.
The Creaming Method
Want cakes that are soft and fluffy or cookies that practically melt in your mouth? The creaming method is your go-to technique. It involves beating butter and sugar together until the mixture becomes light and airy, creating tiny air pockets that help your baked goods rise naturally.
"The creaming method is a technique used in baking to incorporate air into a batter to provide a natural rise. In the creaming method, a fat (normally butter) is beaten together with granulated or caster sugar. The process creates pockets of air that are trapped in the butter around each sugar granule." – Global Bakes [15]
How It Works
The sharp edges of sugar crystals cut into the butter as you mix, forming air bubbles that expand during baking. For best results, use butter at room temperature (around 68°F) and beat it with sugar for 3–5 minutes using an electric mixer. You’ll know it’s ready when the mixture is pale, fluffy, and almost doubles in volume [16][17]. Be careful not to overmix, as this can collapse the air pockets you’ve worked so hard to create.
When adding eggs, do it gradually, and alternate between dry and wet ingredients to maintain the batter’s aeration [15][16].
Folding and Layering Techniques
Folding and layering are essential for creating the flaky, tender textures that make pastries irresistible. These methods involve working dough and fat together to form thin layers that separate during baking, resulting in that perfect buttery crispness.
Why It Works
Folding stacks layers of butter within the dough. As the pastry bakes, the butter releases steam, pushing the layers apart and creating that flaky texture [18].
"The folding method works much better when the fat is cold and firm and the dough has had time to relax." – Erin McDowell, Savory Baking Author [18]
How to Fold
Start by rolling your dough into a rectangle. Fold one third over the center, then fold the remaining third over the top – like folding a business letter. Rotate the dough 90 degrees, gently pat it back into a rectangle, and repeat. To keep the butter firm, chill the dough between folds if needed.
How Many Folds?
The number of folds depends on what you’re making. For pie dough, 2–3 folds are enough to achieve flakiness. If you’re going for something like rough puff pastry, 4–6 folds will give you more pronounced layers.
"For pie dough, I recommend just two to three folds. I call this my ‘extra flaky’ dough. When you get into four to six folds, you’re more in rough puff pastry territory – a lot more visibly flaky." – Erin McDowell, Savory Baking Author [18]
Understanding Baking Science
Baking is more than just following recipes – it’s a science. Knowing the "why" behind each step helps you troubleshoot problems and improve your results.
Precision Is Key
Accuracy is crucial in baking. Even small differences in measurements can alter the texture, flavor, or appearance of your final product [19]. Using a kitchen scale to weigh ingredients is far more reliable than measuring by volume.
Leavening Agents
Leavening agents like baking powder, baking soda, and yeast are the backbone of baked goods. Baking soda needs an acid to activate, while baking powder contains both an acid and a base, activating when exposed to moisture and heat.
How Heat Works in Baking
Your oven uses three types of heat transfer: conduction (direct contact), convection (air circulation), and radiation (heat from the oven walls) [1]. This is why pan placement matters – center racks typically provide the most even heat distribution.
The Bigger Picture
While quality tools and ingredients are important, mastering technique is what truly sets great bakers apart [20]. Focus on understanding the principles behind each step, and you’ll develop the intuition needed to handle any recipe with confidence.
sbb-itb-7261261
Step-by-Step Recipes for Classic Pastries and Breads
These recipes are designed to help you build confidence and refine your baking skills. Each one focuses on essential techniques that can be applied to a variety of other baking projects.
Making Tart and Pie Crusts
Put your dough-handling skills to the test with a tart crust. Unlike pie dough, tart dough has a cookie-like texture – crumbly, slightly sweet, and perfect for fruit tarts, custards, or chocolate ganache fillings [21].
Sweet Tart Crust Recipe
This recipe yields a single 9-inch tart crust and takes about 1 hour and 45 minutes, including chilling time [21].
Ingredients:
- 1½ cups (180g) all-purpose flour
- ½ cup (55g) powdered sugar
- ¼ teaspoon salt
- ½ cup (115g) cold butter, cubed
- 1 large egg
- ½ teaspoon vanilla extract (optional)
Instructions:
Start by combining the flour, powdered sugar, and salt in a food processor. Pulse to mix, then add the cold butter cubes. Continue pulsing until the mixture resembles coarse breadcrumbs [21].
Add the egg and vanilla extract (if using), and pulse just until the dough begins to clump together. Be careful not to overmix. Transfer the dough to a floured surface, shape it into a ball, flatten it into a disc, wrap it tightly in plastic wrap, and refrigerate for at least 1 hour [21].
When you’re ready to bake, roll the chilled dough into an 11-inch circle on a floured surface. If the dough cracks, let it sit at room temperature for a few minutes to soften. Transfer it to a tart pan, trim the edges, and freeze for 30 minutes to prevent shrinking during baking [21].
Blind Baking the Crust
Preheat your oven to 375°F. Line the crust with parchment paper or aluminum foil and fill it with pie weights, dried beans, or uncooked rice to keep it from puffing up. Bake for 20 minutes, then remove the weights and bake for another 5–10 minutes to achieve the desired doneness [21].
Tips for Success:
- Use powdered sugar for a tender crust. Adjust the dough’s moisture by adding a little water or flour if needed [21].
- A kitchen scale ensures more consistent results than measuring by volume [22].
"The most flaky, tender crust comes down to a simple 3:2:1 ratio of ingredients – flour, fat, water – no actual recipe needed." – Megan Dorn, Author [23]
Bread Basics for Beginners
Key Principles for Bread-Making
Bread-making requires precision. Using a kitchen scale is especially important since flour measurements can vary significantly depending on how you scoop it [25][26]. Stick to the specific type of flour called for in your recipe to get consistent results.
Working with Yeast
Store yeast in the refrigerator to extend its shelf life [26]. When adding salt and yeast to your dough, place them on opposite sides of the bowl to avoid deactivating the yeast [25]. Always bloom yeast in warm water (90°F–130°F) before mixing it with other ingredients. Let it foam for 10–15 minutes to confirm it’s active [26].
Proofing and Shaping Dough
Use the poke test to check if your dough is fully proofed. Gently press a finger into the dough – if the indentation springs back slowly, it’s ready. If it springs back too quickly, it needs more time. If it doesn’t spring back at all, it’s been over-proofed [26].
Baking Tips
Create steam in your oven by placing a pan of hot water on the bottom rack or misting the oven walls with water. This helps create a chewy, flexible crust [25]. Keep the oven door closed for the first 20 minutes to allow for "oven spring", the final rise that happens during baking [25].
Your bread is done when it sounds hollow when tapped on the bottom or when an instant-read thermometer reads 190–200°F in the center [24][25]. For same-day loaves, bake at 350°F in a convection oven or 375°F in a conventional oven [24].
Common Mistakes to Avoid:
- Adding too much flour can make bread dense and dry [26].
- Over-proofing or under-proofing affects the bread’s texture [26].
- Using water that’s too hot will kill the yeast [26].
- Opening the oven door too early can prevent proper rising [25].
Simple Dessert Pastries
These dessert recipes use puff pastry to create elegant treats with minimal effort. Store-bought puff pastry is a great option for beginners, saving time while still delivering impressive results [27].
Easy Fruit Turnovers
Thaw frozen puff pastry as directed on the package. Cut it into squares, spoon your favorite fruit filling (like cherry pie filling) into the center, fold diagonally, and seal the edges with a fork. Brush with beaten egg and bake according to the package instructions [27].
Three-Ingredient Strawberry Tarts
Roll out thawed puff pastry and cut it into rectangles. Score a border around the edges, then layer the center with fresh strawberry slices and sprinkle with sugar. Bake until the pastry is golden and puffed [28].
Quick Nutella Pastries
For a chocolatey treat, use puff pastry, Nutella, and Cool Whip. Cut the pastry into squares, add a dollop of Nutella, fold, and bake. Once cooled, top with piped Cool Whip for an indulgent finish [28].
Raspberry Palmiers
These elegant cookies require just three ingredients: puff pastry, fresh raspberries, and brown sugar. Roll out the pastry, sprinkle with brown sugar and crushed raspberries, and roll both long sides toward the center. Slice and bake for beautiful spiral cookies that look bakery-made [28].
Pastry Tips for Success:
- Work with cold puff pastry – it’s easier to handle when chilled.
- Don’t skip the egg wash; it gives pastries their signature golden color.
- Use parchment paper to prevent sticking.
- Frozen puff pastry is a versatile shortcut for quick, impressive desserts [27].
Mastering these recipes will give you a solid foundation in baking techniques. With these skills, you’ll be ready to take on more challenging projects while understanding the purpose behind each step.
Recommended Resources for Aspiring Bakers
Take your baking skills to the next level with these carefully selected resources, including must-read books, online classes, and handy tools for recipe conversions.
Top Baking Books
Author Kassie Mendieta perfectly sums up the value of a great cookbook:
"To me, a cookbook is worth it when you don’t have to bake from it to learn from it. If I can casually read it like a bedtime story and learn about a new technique or ingredient, then for me – it’s worth it." [29]
Technique and Science Books
If you’re curious about the science behind baking, BakeWise by Shirley O. Corriher is a fantastic place to start [31]. Michael Ruhlman’s Ratio breaks down the essential proportions that professional bakers rely on [29]. For a deep dive into the structure of grains and gluten, Nicola Lamb’s SIFT is a treasure trove of diagrams and insights [29]. For flavor mastery, Samin Nosrat’s Salt Fat Acid Heat teaches the art of seasoning [29], while The Flavor Bible by Andrew Dornenburg and Karen A. Page guides you in pairing ingredients like a pro [29].
Recipe Collections
Looking for reliable recipes? Bouchon Bakery by Thomas Keller and Sebastien Rouxel offers everything from simple cookies to intricate pastries like tarts and croissants [30]. For a broader foundation, Sarah R. Labensky’s On Baking: A Textbook of Baking and Pastry Fundamentals covers topics ranging from laminated doughs to product identification [30]. Meanwhile, The Pastry Chef’s Little Black Book by Michael Zebrowski and Michael Mignano is packed with recipes designed for professional kitchens [29].
Home Baking
For home bakers, Claire Saffitz’s Dessert Person includes a unique recipe matrix that categorizes recipes by difficulty and time [29]. The King Arthur Baking School offers a variety of recipes, from simple cookies to challenging pastries like macarons [31]. Melissa Weller’s A Good Bake provides scientifically crafted recipes for consistent results [31], while the Cook’s Illustrated Baking Book makes baking approachable with its educational content [31].
Specialized Focus Areas
Bread enthusiasts will love Ken Forkish’s Flour Water Salt Yeast, which makes bread baking feel intuitive [31]. Chad Robertson’s Tartine Bread offers step-by-step instructions for creating sourdough starters [31], and Maurizio Leo’s The Perfect Loaf is a comprehensive guide for sourdough lovers [31].
Before You Buy
Before committing to a cookbook, take time to explore it. Flip through a physical copy at your local bookstore to see if the recipes and style resonate with you [29]. Libraries often have updated cookbook collections, and apps like Libby let you check them out digitally [29].
Online Resources and Tutorials
Books are excellent for learning theory, but online classes bring techniques to life with hands-on guidance. To avoid feeling overwhelmed, start with one specific recipe or technique [32].
Structured Learning Platforms
- America’s Test Kitchen Cooking School: Offers foundational skills with expert guidance. Plans start at $19.95 per month, or $39.95 per month for instructor feedback [32].
- The Butter Book: Focuses on bread baking, pastry, and cake decorating. Subscriptions are $24.99 per month or $199 annually [32].
- MasterClass: Features culinary lessons from renowned chefs, including Dominique Ansel’s French pastry techniques, for $180 per year [32].
- Rouxbe: Offers a 90-day vegan dessert course for $399.99, with a $39.99 monthly extension option [32].
Specialized Instruction
- House of Bread: Beginner-friendly bread-making classes priced at $9.95 per session [32].
- Bake! at Zingerman’s Bakehouse: Virtual classes on American classics, priced between $20 and $75 [32].
As Sara Molinaro, Principal Instructor at Bake! at Zingerman’s Bakehouse, explains:
"One thing that people have said to us over and over again is that when they are taking virtual baking classes, they will confidently replicate the techniques at home because they already had the experience of making it using their oven and their own equipment. That makes them feel more confident replicating what they did." [32]
Equipment for Online Learning
A digital kitchen scale is a must-have for accuracy in online baking classes. Sara Molinaro emphasizes:
"Before taking an online baking class, you should buy a kitchen scale. You have to have a kitchen scale for accuracy. A kitchen scale is the easiest and quickest way to up your baking game, and a good one does not need to cost more than like 15 bucks." [32]
Converting Recipes to US Standards
Adapting international recipes to US standards ensures they work seamlessly in your kitchen. While the process may seem tricky, it’s easy with the right tools and techniques.
Temperature Conversions
International recipes often use Celsius, while US ovens display Fahrenheit. To convert Celsius to Fahrenheit, multiply the Celsius temperature by 1.8 and add 32 [35]. For reference:
| Celsius | Fahrenheit |
|---|---|
| 120°C | 248°F |
| 135°C | 275°F |
| 160°C | 320°F |
| 175°C | 347°F |
| 190°C | 374°F |
| 220°C | 428°F |
| 230°C | 446°F |
Volume Measurements
Measurement standards vary by country. For example, one cup equals 237 milliliters in the US, 227 milliliters in the UK, and 250 milliliters in Australia [34].
| Metric | US Customary |
|---|---|
| 5 ml | 1 teaspoon |
| 15 ml | 1 tablespoon |
| 60 ml | 1/4 cup |
| 125 ml | 1/2 cup |
| 250 ml | 1 cup |
| 500 ml | 2 cups (1 pint) |
| 950 ml | 4 cups (1 quart) |
Measurement Tools and Techniques
For best results, use liquid measuring cups for liquids and dry measuring cups for solids. A digital kitchen scale can handle both metric and imperial units [33][35]. When converting, remember to multiply when going from larger to smaller units and divide when going the other way [36]. Many recipe websites, like Allrecipes.com, include built-in conversion tools – just look for the "Metric" button to switch measurements easily [34].
Conclusion: Building a Strong Base in Baking and Pastry Arts
Mastering baking and pastry arts is all about blending precision with creativity. This guide has walked you through the key tools, techniques, and foundational knowledge essential for professional baking. With these skills, you’re ready to take your baking to the next level.
The best bakers know that science and artistry go hand in hand. As Wes Duckworth, a graduate of Escoffier Boulder’s Baking and Pastry program and a seasoned pastry chef, puts it:
"Escoffier really teaches you the science behind food. You understand what each component does down to the molecular level. It’s a lot easier to change recipes or figure out how it’s going to work because baking is chemistry. It’s just knowing what those ingredients are going to do." [37]
Use this insight as you refine your craft. Focus on precise measurements, understanding ingredient functions, and honing your coordination. Tools like checklists and step-by-step reviews can help you stay on track. Once you’ve mastered the basics, don’t hesitate to experiment with bold flavors and creative ideas – baking is as much about self-expression as it is about technique.
One habit that can elevate your baking is embracing mise en place, which means preparing all your ingredients and tools before you start. This approach ensures smooth execution and allows you to focus on the process, whether you’re baking at home or in a commercial kitchen.
While practice is key, formal training can help you progress faster. Structured programs offer access to advanced techniques, expert feedback, and professional-grade tools. They also open doors to career opportunities – pastry chefs, for instance, earn a median annual salary of $64,633 [38].
For those considering formal education, Park City Culinary Institute’s Pastry & Baking Certificate program is an option to explore. With 96 hours of hands-on training for $6,260 (and flexible payment plans), this program combines the science of baking with the art of presentation. It’s designed to build both technical expertise and creative confidence. As Pastry Chef Tony Olsson shares:
"It’s the gratitude we receive from our customers when they think a product is really delicious… In this job, I get to play a part in making others happy by sharing knowledge and through great ingredients."
Whether you’re learning from books, online tutorials, or professional courses, remember this: baking is about sharing joy with every creation. Start with the fundamentals, practice consistently, and watch your skills transform over time.
FAQs
What are some common mistakes to avoid when working with dough?
When working with dough, there are a few pitfalls that can throw off your baking game. Here’s what to watch out for:
- Overworking the dough: Kneading or mixing too much can overdevelop the gluten. This often results in tough or dense baked goods, especially when making pastries.
- Too much handling of delicate dough: For doughs like puff pastry, excessive handling can lead to shrinkage and a loss of that signature flakiness.
- Incorrect ingredient temperatures: Using ingredients that are either too warm or too cold can mess with the dough’s texture and structure.
- Inaccurate measurements: Baking is all about precision. Always use proper tools, like measuring cups or a kitchen scale, to get your quantities just right.
To sidestep these problems, treat your dough with care, ensure your ingredients are at the right temperature, and measure everything accurately. With a little practice and attention to detail, you’ll be turning out bakery-level results in no time!
What are the best tips for keeping my baked goods consistent in texture and flavor every time?
To get consistently great texture and flavor in your baked goods, start with fresh, high-quality ingredients and make sure to measure them precisely. For the most accurate results, use a kitchen scale to weigh your ingredients instead of relying on cups and spoons.
Always preheat your oven and double-check the temperature with an oven thermometer – small temperature differences can make a big impact on how your treats turn out. For recipes like cookies and pastries, chilling the dough before baking often leads to better texture. Also, pay close attention to ingredient temperatures. For example, if a recipe calls for room-temperature butter or eggs, using them straight from the fridge can throw off the mixing process and affect how evenly your baked goods cook.
Stick to these tips, and you’ll be well on your way to baking success with consistently delicious results.
What tools and resources should I use to take my baking skills to the next level?
To take your baking game to the next level, having the right tools can make all the difference. Think about adding professional-grade equipment to your kitchen, like a sturdy stand mixer, a digital kitchen scale for precise measurements, and some specialty tools like pastry cutters and piping bags. These aren’t just fancy gadgets – they’re essentials for tackling more advanced baking techniques with accuracy and finesse.
When it comes to learning, dive into expert-recommended resources like Michel Suas’s Advanced Bread and Pastry. This book is packed with detailed insights into complex baking methods. If you’re looking to go even deeper, consider enrolling in courses offered by well-known culinary schools. These classes can help you polish your techniques and give you a deeper appreciation for the science behind baking. With these tools and resources, you’ll be well on your way to mastering intricate recipes and leveling up your baking skills.