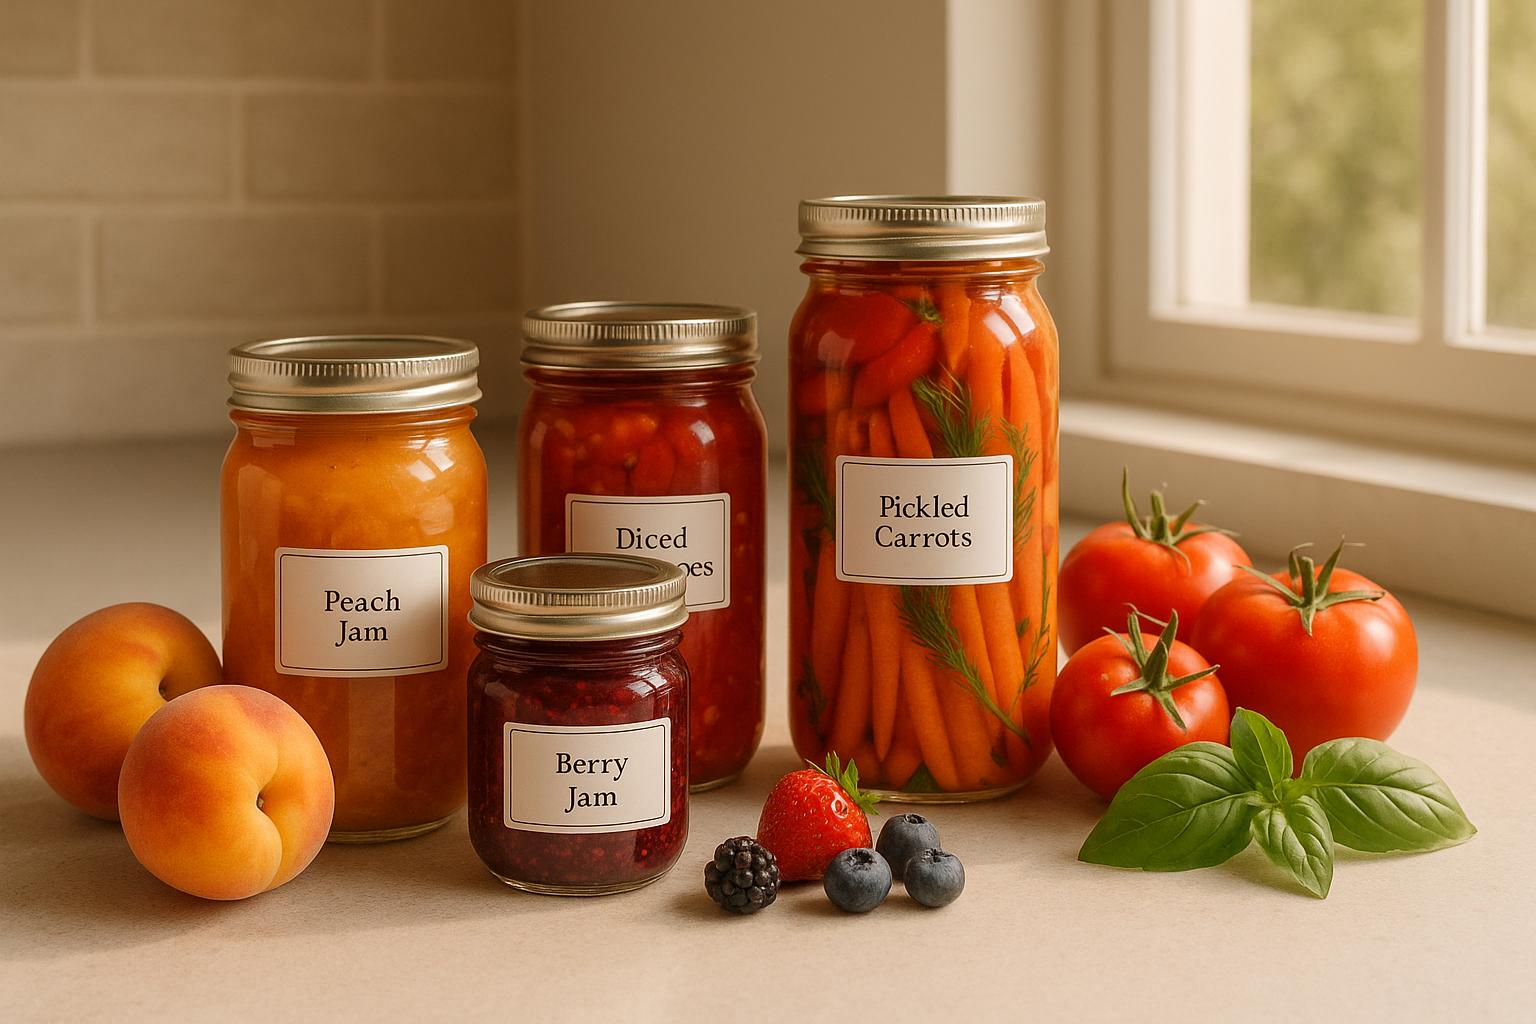
Preserving seasonal produce is a smart way to enjoy peak flavors, reduce food waste, and save money. By timing your efforts with local harvests, you can stock up on fruits, vegetables, and herbs when they’re at their best. From freezing berries in summer to canning tomatoes in the fall, each season offers unique opportunities to extend the life of fresh ingredients. Here’s a quick breakdown:
- Winter (Jan–Mar): Preserve hearty root vegetables (carrots, beets) and citrus fruits through freezing or fermentation.
- Spring (Apr–Jun): Focus on delicate greens, asparagus, and berries using quick-freezing or light pickling.
- Summer (Jul–Sep): Can or dehydrate tomatoes, peaches, and corn to savor their vibrant flavors year-round.
- Fall (Oct–Dec): Store apples, pumpkins, and squash through canning or freezing.
Preservation techniques like freezing, canning, drying, and fermenting each have their strengths. For example, freezing is quick and nutrient-friendly, while canning offers long-term storage without electricity. With the right tools – like vacuum sealers, canning jars, or dehydrators – you can easily incorporate preservation into your routine. Whether you’re a home cook or a culinary professional, mastering these methods allows you to make the most of every season.
8 Fall Canning & Preserving Recipes You’ll use Everyday! | Sept Pantry Chat
Month-by-Month Guide to Seasonal Ingredients
Timing is everything when it comes to preserving fresh produce. According to the U.S. Department of Agriculture (USDA), over 70% of fresh produce sales are influenced by seasonal cycles [3]. This highlights just how crucial it is to align your preservation efforts with local harvest times to make the most of what’s in season.
January to March: Winter Harvest and Root Vegetables
Winter is the season of hearty produce. In many areas, citrus fruits like oranges and grapefruits hit their stride, while an assortment of root vegetables – think carrots, parsnips, turnips, and beets – are at their freshest. Sturdy greens such as kale and cabbage also thrive in the cooler months. These ingredients are perfect for preservation techniques like freezing or fermentation, which help maintain their flavor and nutritional value.
April to June: Spring Greens and Early Fruits
Spring brings a wave of tender greens and early fruits. This is the time for asparagus, peas, fresh herbs, and the first berries of the year. Their delicate nature makes them ideal for preservation methods that emphasize keeping their crisp textures and bright flavors intact, such as quick-freezing or light pickling.
July to September: Summer Produce
Summer is all about abundance. This is when tomatoes, peaches, plums, cucumbers, peppers, summer squash, and corn are at their peak. Their vibrant flavors and high quality make them excellent candidates for canning, pickling, dehydrating, or freezing. Preserving summer’s bounty ensures you can enjoy the season’s best tastes long after the heat fades.
October to December: Fall Fruits and Late Harvest
Fall is the season of storage crops and late-harvest fruits. Apples, pumpkins, winter squash, cranberries, and hearty greens like collards and Swiss chard dominate the scene. These ingredients are well-suited for canning, fermenting, or freezing, making it easy to stock up for the colder months.
"Eating seasonally is a great, easy way to boost your nutrient intake, save money, reduce your environmental footprint, and support local farmers! What’s not to love?"
- Annie Cavalier, MS, RDN, LD [2]
Regional differences add another layer of opportunity. For example, spring in the Northeast features mushrooms, rhubarb, and cherries, while the Southwest sees corn, avocados, and apricots. Fall in the Northwest highlights fennel, garlic, and kale, whereas the Southwest offers avocados, dates, and pomegranates. Winter in the Northwest brings root vegetables and clementines, contrasting with the citrus and strawberries found in the Southwest [1]. By understanding these regional trends, you can tailor your preservation plans to match your local peak seasons, ensuring top-quality ingredients while keeping costs down.
Once you’ve mastered the timing, the next step is learning the preservation techniques that will let you savor these seasonal flavors all year long.
Key Preservation Techniques
Once you’ve matched seasonal produce with its peak harvest time, the next step is figuring out how to preserve it effectively. Each method has its own way of keeping food fresh and flavorful, and understanding the science behind them can help you decide which approach works best for your ingredients.
Freezing: Quick and Convenient
Freezing works by stopping nutrient loss, bacterial growth, and enzyme activity [7]. It’s one of the easiest ways to preserve food, especially for delicate items like berries, leafy greens, and peas.
To get started, prepare your produce by vacuum sealing or wrapping it tightly. Make sure your freezer is set to 0°F [8] for the best results.
"A freezer is only as good as how your food is prepped." – Stacey Ballis [8]
For items like berries or cut vegetables, individual quick-freezing is a game-changer. Spread them out on a baking sheet, freeze until solid, then transfer to containers. This prevents clumping and makes portioning easier later on. If you’re freezing cooked foods, let them cool to room temperature first, and always label everything with dates to follow a first-in, first-out system.
Canning: Long-Term Storage
Canning relies on high heat to kill microorganisms and create a sterile, sealed environment [6]. This method is perfect for pantry staples and doesn’t require electricity for storage.
There are two main types of canning:
- Water bath canning: Best for high-acid foods like fruits, pickles, and acidified tomatoes.
- Pressure canning: Necessary for low-acid items such as vegetables, meats, and poultry.
While canning does result in some nutrient loss due to heat [5], it offers unbeatable convenience and shelf life for enjoying seasonal produce year-round.
Safety is critical. Always use scientifically tested recipes [9] and adjust for altitude if needed. For pressure canning, make sure to vent the canner properly [9] and have its gauge tested annually. Avoid common mistakes like adding extra ingredients to recipes, using ovens instead of water baths, or cooling the canner under running water – these shortcuts can compromise both safety and quality.
Drying and Dehydrating: Lightweight and Long-Lasting
Drying removes moisture, which prevents bacteria and mold from growing [4]. This age-old technique works especially well for herbs, mushrooms, apples, and peppers, creating lightweight, easy-to-store foods.
Temperature control is key. Herbs need gentle heat (95°F to 115°F), while fruits can handle higher temperatures (135°F to 145°F). Slice ingredients evenly [10] to ensure consistent drying, and don’t overcrowd dehydrator trays.
Blanching vegetables before dehydrating is a smart step – it helps preserve their color and nutrients [10]. Rotate trays during the drying process to ensure even moisture removal.
Keep in mind that some foods don’t rehydrate well. For example, dried tomatoes are perfect for pasta dishes, but dehydrated zucchini might work better in soups than as a standalone ingredient.
Fermenting and Pickling: Adding Flavor
Fermentation uses good bacteria to convert sugars into acids, creating an environment where harmful bacteria can’t thrive [6]. This method not only preserves food but also produces tangy, probiotic-rich options like sauerkraut, kimchi, and fermented pickles.
Fermentation can even boost the availability of certain nutrients [4], making these foods more nutritious than their fresh counterparts. However, success depends on maintaining the right salt concentration and temperature.
Quick pickling offers a simpler alternative. By using vinegar-based solutions, you can preserve vegetables like cucumbers and onions almost immediately. While this method doesn’t provide probiotic benefits, it’s a fast way to add flavor and extend shelf life.
Both techniques work best with sturdy vegetables that hold their texture, such as root vegetables, cabbage, and cucumbers.
| Method | Best For | Pros | Cons |
|---|---|---|---|
| Freezing | Berries, leafy greens, peas | Easy, retains nutrients, minimal tools | Needs electricity |
| Canning | Tomatoes, fruits, pickles | Long shelf life, no electricity needed | Nutrient loss, requires equipment |
| Drying | Herbs, mushrooms, apples | Lightweight, space-saving | Texture changes, time-intensive |
| Fermenting | Cabbage, cucumbers, roots | Adds probiotics, boosts nutrients | Requires time and careful control |
"The best preserved food is one you will use, however you preserved it." – Skandi Rogers, Pollinator
The right preservation method depends on the ingredient, how you plan to use it, and what equipment or space you have available. Many home preservers mix and match techniques – freezing berries for smoothies, canning tomato sauce, and fermenting cucumbers into pickles. Up next, we’ll look at how to set up your kitchen for preservation success.
sbb-itb-7261261
Tools and Supplies for Preservation Success
Once you’ve got the hang of preservation techniques, having the right tools on hand can make all the difference. The right equipment not only saves you time and money but also ensures you get the best results. Whether you’re just starting out or looking to take your skills to the next level, the right tools can help you preserve food efficiently and with confidence.
Basic Equipment for Beginners
Starting out? Focus on affordable, reliable tools that get the job done.
Canning Essentials are the backbone of many preservation projects. Here’s what you’ll need: canning jars (around $15 per dozen), a jar lifter ($8), a funnel ($2), a bubble remover with a headspace tool ($7), and a water bath canner or a large stockpot with a rack (ranging from $50 to $100) [11][12]. Don’t forget a liquid measuring cup and some sturdy kitchen towels – both are handy for safe handling and cleanup.
For additives, stock up on pectin and pickling salt that’s free from additives [11]. A heavy-bottomed stockpot with a five-gallon capacity and a lid is perfect for making larger batches [12].
Freezing Equipment is another straightforward option. Invest in quality freezer bags, containers, and freezer paper. If you’re serious about freezing, a chest freezer is a better choice than a stand-up model since it maintains a more consistent temperature [16]. Adding a temperature sensor can help you keep an eye on conditions. For long-term storage, a vacuum sealer is a worthwhile investment [16].
Dehydrating Setup requires a food dehydrator with adjustable temperature controls and good airflow. Look for models that let you fine-tune settings to suit different ingredients [16].
Fermentation Basics can start with just mason jars and the right kind of salt. As you gain confidence, you might want to upgrade to fermentation crocks for larger batches.
When buying supplies, focus on what matches your preservation goals [11]. If you’re into canning, it’s smart to stock up on jars and lids, especially since supply chain issues can sometimes make them harder to find [12]. Start with beginner-friendly recipes like applesauce or blueberry jam to build your confidence [14].
As you become more experienced, upgrading to higher-end tools will help ensure consistent and high-quality results.
Advanced Tools for Professional Chefs
For those diving into professional preservation, precision and scalability are key. Advanced tools let you handle larger quantities and maintain consistent results.
Pressure Canners (priced between $100 and $150) are a must for low-acid foods and larger batches. Unlike pressure cookers or Instant Pots, true pressure canners are designed to maintain the specific pressure levels required for safe food preservation [11][13].
Steam Canning Equipment is an energy-efficient alternative to traditional water bath canning. It uses less water and energy while delivering similar results, making it a great option for high-volume production [13].
Temperature-Controlled Fermentation Devices are ideal for achieving consistent results. These devices maintain precise temperature and humidity levels, making them perfect for creating artisanal products like sauerkraut or kimchi.
Commercial-Grade Food Processors can handle large quantities and speed up prep work. Durable, high-quality cooking utensils made from premium materials are also worth the investment for their performance and longevity [15].
When choosing equipment, think about your available storage space – for both the tools and the preserved food [17]. Your intended use for the preserved items will also guide you in prioritizing which tools to invest in. Many professionals find it helpful to use a mix of preservation methods, allowing them to choose the best approach for each type of ingredient.
Building your toolkit gradually is the best way to go. Start with one method that fits your most commonly used ingredients, then expand your setup as your skills and needs grow.
Building Skills Through Culinary Training
While earlier sections focused on preservation methods, culinary training bridges the gap between knowledge and real-world application. It’s one thing to understand the theory, but mastering preservation requires hands-on experience that combines technical skill with scientific insight. This kind of training not only reinforces what you’ve learned but also prepares you for professional challenges.
Hands-On Learning for Preservation
Practical experience is key to truly mastering any skill, and food preservation is no exception. Hands-on learning engages participants in a way that purely theoretical instruction cannot. By actively practicing techniques, learners gain confidence, refine their abilities, and deepen their understanding of the processes involved.
"A hands-on activity is an instructional technique that allows participants to learn by doing… Participants get direct practical experience as they apply their learning and learn from their failures. Hands-on learning is appropriate for both physical and mental skills and tasks." – Interactive Activities | Hands-on Practice Activities [20]
Research supports this approach: participants retain up to 75% of information when they actively apply what they’ve learned[20]. Culinary programs, like those offered at Park City Culinary Institute, integrate preservation techniques into their curriculum, teaching students methods such as freezing, drying, canning, jamming, and pickling[19]. These courses ensure that students not only practice the techniques but also understand the science behind them.
"When we interact with our environment, we form stronger memories and better understand concepts." – ALI Staff [21]
Beyond technical skills, hands-on training also sharpens problem-solving abilities – an essential trait for culinary professionals facing real-world challenges.
Practical Applications for Culinary Professionals
Preservation skills aren’t just about technique; they offer tangible benefits for culinary careers. Chefs and food professionals who excel in preservation can reduce costs by buying ingredients at their seasonal peak, minimize waste, and create consistent menus year-round. These skills are particularly valuable in industries like catering and private chef services, where preparing ingredients in advance allows for more creative and diverse menu options.
Formal culinary education also opens doors to broader opportunities. Many programs include courses in restaurant management, food entrepreneurship, and menu development, which are perfect for those planning to start their own food business centered on preservation[18]. Additionally, understanding the science behind preservation – such as the microbiology and chemistry of canning, fermenting, and dehydrating – equips professionals to troubleshoot issues, ensure food safety, and even innovate new techniques.
When selecting a culinary program for preservation training, consider factors like location, reputation, cost, and the range of skills covered. Look for programs that balance hands-on experience with broader professional development, as this combination lays a solid foundation for long-term success in the culinary world.
Investing in comprehensive culinary training is a smart move for anyone aiming to elevate their career. Whether you’re aspiring to work in top-tier restaurants, launch a food venture, or specialize in preservation services, the skills and knowledge gained through such programs can make all the difference.
Conclusion: Preserving the Best of Each Season
This guide has walked you through the art of seasonal preservation, showing how to transform peak harvests into year-round culinary treasures. Preserving ingredients at their seasonal prime locks in their flavor and nutritional value while cutting down on food waste. For instance, freezing summer berries at their ripest keeps their sweetness and vitamins intact far better than relying on out-of-season imports. And this applies to produce from every season[22][24].
Beyond flavor, preserving seasonal produce saves money and reduces environmental impact by cutting down on long-distance transportation and waste[22][24]. It’s a win for your wallet and the planet.
If you’re looking to take your skills to the next level, consider culinary programs like Park City Culinary Institute. These hands-on classes blend practical techniques with a touch of science, helping chefs and home cooks alike create standout dishes. Imagine using a summer-fruit compote to brighten up a winter dessert or adding pickled vegetables as a creative garnish. These techniques not only inspire menu innovation but also help manage costs and align with sustainability goals.
To stay organized, plan preservation efforts around the calendar – freeze berries in July, can corn in September, and ferment cabbage in the colder months. Drying produce is another great option; it removes 80–95% of moisture, creating lightweight, shelf-stable ingredients that last for months[23][24].
Mastering preservation isn’t just about extending the shelf life of ingredients – it’s about opening doors to creativity, saving money, and supporting sustainable practices. As more people embrace seasonal eating and local sourcing, these skills become increasingly relevant. With hands-on training and consistent practice, you can turn seasonal produce into a cornerstone of culinary success, benefiting your kitchen, your budget, and the environment[25].
FAQs
Why is preserving seasonal produce beneficial, and how does it affect flavor and nutrition?
Preserving seasonal produce is an excellent way to savor its peak taste and nutritional value throughout the year. When fruits and vegetables are harvested in their natural season, they ripen fully on the plant, packing in more vitamins, minerals, and antioxidants. As a result, preserved seasonal produce often delivers better flavor and higher nutrient content compared to out-of-season options.
Beyond the health benefits, choosing seasonal produce helps support local farmers and cuts down on the environmental costs tied to transporting goods over long distances. Preserving these ingredients allows you to create fresher, more flavorful meals, cut back on food waste, and save money by purchasing produce when it’s at its most plentiful and budget-friendly.
What’s the best way to preserve seasonal ingredients throughout the year?
The ideal way to preserve produce largely depends on the type of fruit or vegetable and how you intend to use it later. Freezing is a go-to option for many fruits and vegetables, offering a long shelf life while keeping them fresh. For items like apples, berries, and herbs, drying or dehydrating is a simple and effective method that doesn’t require much gear. If you’re working with fruits rich in natural sugars, canning and jam-making are excellent choices. On the other hand, quick pickling is a fun way to add a tangy kick to vegetables like cucumbers, carrots, and peppers.
Choosing the right preservation technique not only helps you enjoy seasonal produce longer but also locks in their flavors and nutrients. In the U.S., freezing and canning have become household favorites, making it easy to savor fresh ingredients all year round.
What basic tools do I need to start preserving seasonal ingredients at home?
To get started with preserving seasonal ingredients at home, you’ll need some basic tools. First, make sure you have canning jars with lids and bands, a large stockpot or canner, and a jar lifter to handle hot jars safely. A funnel is also handy for transferring liquids without making a mess, and a jar wrench helps you seal jars securely.
Other useful items include a sharp knife for prepping produce, measuring cups and spoons for accuracy, and a food mill or strainer to process fruits and vegetables. These tools not only make the job simpler but also help keep your preserved foods fresh and safe for enjoying throughout the year.