Starting culinary school? Here’s what you need to know to set up your kitchen like a pro:
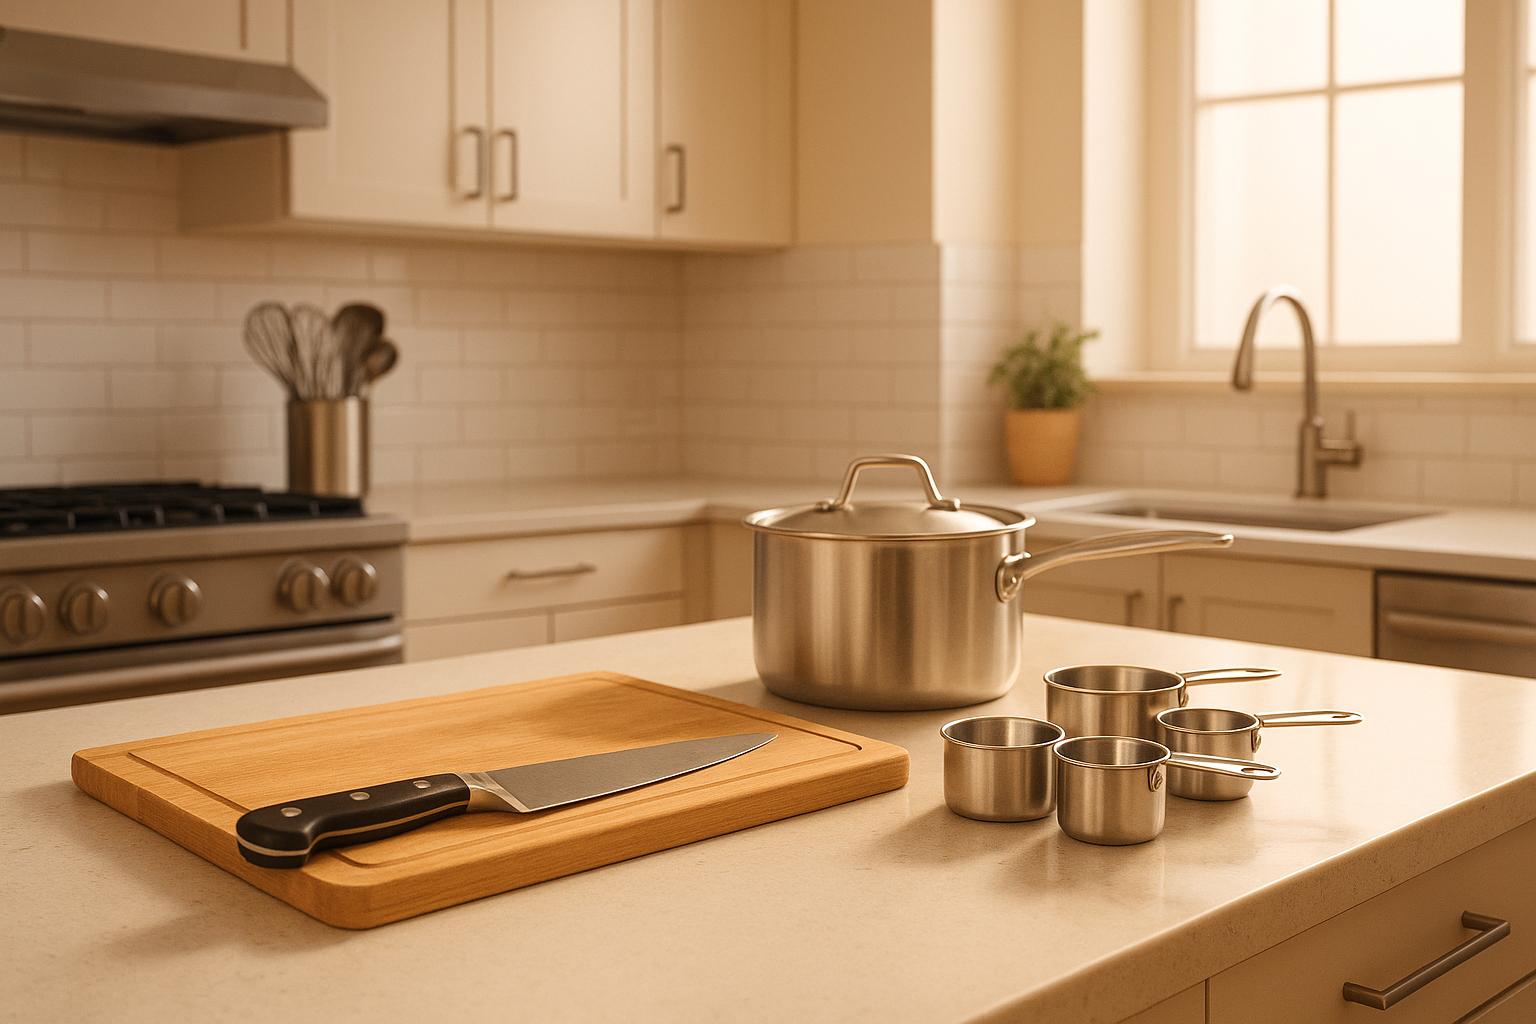
- Essential Tools: Invest in a chef’s knife, paring knife, serrated bread knife, and honing steel. Add cookware like stainless steel frying pans, a cast iron skillet, a stockpot, and a Dutch oven.
- Must-Have Utensils: Heat-resistant spatulas, wooden spoons, tongs, measuring tools, an instant-read thermometer, and prep bowls are non-negotiable.
- Organized Workspace: Use color-coded cutting boards, maintain a clean prep station, and follow food safety rules like labeling and proper food storage.
- Cleaning Supplies: Stock up on scrub brushes, dish soap, microfiber cloths, and gloves. Regular maintenance of knives, cookware, and appliances is key.
- Time Management: Practice mise en place – prepare ingredients and tools ahead of time for a smoother workflow.
Quick Tip: Keep your tools sharp, workspace tidy, and follow a "clean-as-you-go" mindset to build professional habits that will serve you throughout your culinary career.
Jumpstart your journey with this checklist and set yourself up for success in the kitchen!
What’s in a culinary student kit? | Brazilian Kitchen
Required Kitchen Tools and Equipment
Getting started in the kitchen is all about equipping yourself with the right tools. The right gear not only makes cooking easier but also helps you work more efficiently and hone your skills. Here’s what you’ll need to kick off your culinary journey.
Knives and Cutting Tools
A solid knife collection is the cornerstone of any kitchen. Start with these essentials:
- Chef’s Knife: An 8-inch chef’s knife is your go-to for slicing, dicing, and chopping. The Wusthof Classic 8-Inch Chef Knife ($169.99) is a reliable choice. If you prefer a straight-edged option, consider a santoku-style knife for a slightly shorter and more precise blade.
- Paring Knife: Perfect for smaller, detailed tasks like peeling or trimming. The Victorinox Little Red Knife ($10.99) is a budget-friendly option that delivers quality.
- Serrated Bread Knife: Ideal for cutting through crusty breads without crushing them. The Wusthof Ikon 9-Inch Double Serrated Bread Knife ($199.99) excels in this role.
Investing in forged knives is worth it – they’re stronger and more durable than stamped alternatives. To keep your knives in top shape, a honing steel is a must for regular maintenance. For a comprehensive starter set, the Wusthof 6-Piece Ikon Starter Set ($414.99) includes essential knives, a honing steel, kitchen shears, and a knife block. Proper storage is also key. The Wusthof 14-Slot In-Drawer Knife Organizer ($47.99) paired with a cleaning brush like the Joseph Joseph Blade Cleaning Brush helps extend the life of your knives.
Cookware Basics
When it comes to cookware, prioritize pieces that are versatile and built to last. Stainless steel is a great all-around choice – it handles high heat, distributes it evenly, and works on any cooktop.
- Frying Pans: A stainless-steel frying pan like the Made In 10-Inch Stainless Clad Frying Pan ($129) offers durability and even heating. For a more affordable option, check out Tramontina‘s 12-Inch Skillet ($42). If you’re cooking delicate foods, nonstick pans like the Made In Cookware ProCoat 10-Inch Nonstick Frying Pan ($149) or T-fal Professional Nonstick Fry Pan ($42) are excellent choices.
- Saucepan: A 3-quart saucepan is perfect for making sauces, cooking grains, or reheating leftovers. The All-Clad Saucepan ($150) is a high-quality option, and a saucier with rounded edges can make whisking tasks easier.
- Cast Iron Skillet: The Lodge Cast Iron Skillet ($41) is a classic for high-heat cooking, whether on the stove, in the oven, or over an open flame.
- Dutch Oven: For braising or one-pot meals, a Dutch oven is invaluable. The Staub 5.5-Quart Round Cocotte ($400) and the Le Creuset Enameled Cast Iron Round Dutch Oven ($420) are both durable and reliable.
- Stockpot: An 8-quart stockpot is essential for making soups, stocks, or pasta. The Misen 8-Quart Stainless Steel Stockpot ($199) is a sturdy choice for larger cooking tasks.
Basic Utensils and Gadgets
With your knives and cookware set, round out your kitchen with these must-have utensils and tools:
- Spatulas: Heat-resistant spatulas come in rubber, silicone, or metal. Silicone versions are great for nonstick surfaces, while metal spatulas handle high-heat tasks.
- Wooden Spoons: Gentle on cookware, wooden spoons are ideal for stirring and mixing. Keep a variety of shapes and sizes on hand.
- Tongs: Perfect for flipping, turning, and moving food safely.
- Measuring Tools: Digital scales, measuring cups, and measuring spoons ensure precision in your cooking.
- Instant-Read Thermometer: A quick way to check the doneness of meats and other dishes.
- Vegetable Peeler: A sharp, replaceable blade saves time and reduces waste.
- Whisks: Different sizes are useful for tasks ranging from mixing sauces to whipping cream.
- Prep Bowls: Keep your ingredients organized and ready.
- Can Opener: A reliable can opener is essential for safely opening canned goods.
Optional Appliances
While not strictly necessary, a few appliances can make your kitchen setup even more efficient:
- Hand Blender: Great for pureeing soups, blending sauces, and working with small batches.
- Food Processor: Speeds up prep tasks like chopping, slicing, and mixing – especially handy for baking or large-batch cooking.
- Stand Mixer: If you’re into baking, a stand mixer can handle heavy doughs and large quantities with ease.
Many culinary programs provide access to larger appliances, so focus on buying only what you’ll use regularly and can easily transport. Choose appliances that will truly complement your cooking style and needs.
Food Preparation and Storage Basics
Organizing your food prep and storage areas is essential for working efficiently, reducing waste, and meeting the food safety standards you’ll encounter throughout your culinary career.
Prep Tables and Workspace Setup
Your prep station is where everything comes together, so setting it up properly is crucial. Stainless steel tables are a solid choice – they’re durable, easy to clean, and built to handle heavy use. When selecting a table, pay attention to the steel gauge: 18-gauge tables are lighter and more affordable, ideal for basic tasks, while 14-gauge tables are sturdier and better suited for heavy-duty jobs like meat butchering.
Keep your workspace practical and organized. Place essential tools and ingredients within easy reach, and secure cutting boards with wet towels to prevent slipping. Arrange seasonings, utensils, and knives nearby, storing knives on a dry towel for added stability. Use shelving units or racks to keep pans and utensils neatly arranged.
"An organized commercial kitchen is a productive kitchen." – Boelter [3]
Implement a landing zone system to keep your cutting board free from clutter. Stainless steel hotel pans work well as scrap containers, and a bench scraper can help you quickly clear prepped items off your board. This setup not only keeps your station tidy but also reduces the risk of cross-contamination during busy prep sessions.
Color-coded cutting boards are a must for maintaining food safety. Use different colors for specific food groups – red for raw meat, yellow for poultry, blue for seafood, green for vegetables, and white for dairy and bread. This system is a simple yet effective way to prevent cross-contamination and demonstrates your understanding of professional kitchen safety practices.
Adopt a clean-as-you-go mindset. Keep a trash bowl and wet towel nearby for quick cleanup, and wipe down surfaces frequently. Address spills immediately to maintain a safe environment, and avoid letting dirty dishes pile up during prep. Once your prep area is in order, focus shifts to proper storage techniques.
Storage Containers and Labeling
After organizing your prep station, turn your attention to storage. Proper food storage not only safeguards your ingredients but also ensures compliance with food safety regulations. Label any food that’s not in its original packaging – this isn’t just a good habit; it’s a professional requirement.
For TCS foods (Time and Temperature Control for Safety), labels should include the food name, manufacture date, and use-by date. These items can be stored for up to seven days at 41°F or lower, with the day of preparation counting as day one. If they aren’t used within seven days, they must be discarded.
Store dry goods and prepared foods in labeled, airtight containers. Opt for stackable containers that fit well in your refrigerator to save space and keep things orderly. Pre-measuring frequently used ingredients into deli containers can speed up your cooking process and help you practice mise en place.
Follow the FIFO rule (First In, First Out) to reduce waste. Place older stock at the front and newer items behind it. This simple rotation system minimizes spoilage and can save you money – especially important when you’re working with a tight budget.
Refrigerated foods should be stored in covered containers or sealed storage bags, leaving enough space for air to circulate. Always check storage instructions on labels and discard spoiled food immediately. Remember, if you’re unsure whether something is safe to use, it’s better to throw it out – food safety is non-negotiable.
For items served without temperature control, timing is critical. Cold foods must be sold or consumed within six hours, while hot foods have a four-hour limit. Clearly label these items with the time they were removed from temperature control and their discard time.
Finally, store chemicals in a designated area, well away from food. Proper labeling and separation of chemicals prevent accidental contamination and reinforce your commitment to maintaining a safe kitchen environment.
Cleaning and Maintenance Supplies
Keeping your kitchen clean isn’t just about appearances – it’s about ensuring food safety, prolonging the life of your equipment, and maintaining a professional workspace. Just like setting up your kitchen, having the right cleaning supplies and a consistent maintenance routine is essential for a safe and efficient environment.
Essential Cleaning Tools
To tackle the unique demands of a kitchen, you’ll need a mix of basic and specialized cleaning tools. Some must-haves include scrub brushes, dish cloths, scrubbing pads, steel wool, paper towels, scrapers, rubber gloves, grease-cutting dish soap, multi-purpose cleaners, and a dish drainer [4].
For scrubbing, consider options like the Lean and Mean Scrub Brush ($5.95) or the Be Good Dish Brush ($5.95). Pair these with durable dish cloths such as the Full Circle Tidy Dish Cloth 3-Pack ($8.76) or the Excello Scrubber Dish Cloths Set of 6 ($9.00). Other essentials include baking soda, cleaning wipes, Bon Ami ($1.69), and Bar Keeper’s Friend ($4.80) [5].
Rochelle Bilow, a graduate of the French Culinary Institute, shared her insight in January 2022:
"After graduating culinary school, I introduced four key cleaning products into my own kitchen. Eleven years later, I’m still using these helpful – and inexpensive – essentials on the regular." [5]
Bar Keeper’s Friend is particularly effective for removing tough stains on stainless steel, while Bon Ami is gentle enough for delicate surfaces without causing scratches.
To protect your hands, opt for gloves like the True Blues Ultimate Household Gloves ($10.95) or the Casabella Water Stop All-Purpose Gloves Set of 2 ($12.99). Microfiber cloths, kitchen degreasers, and all-purpose sprays are also invaluable. If you’re looking to save money, restaurant supply stores often have durable options designed for heavy use. Remember, well-maintained tools last longer and perform better.
Once you’ve gathered your cleaning supplies, the next step is establishing a regular maintenance routine to keep your tools and equipment in top shape.
Maintenance Tips for Tools and Equipment
Proper maintenance not only keeps your tools performing their best but also extends their lifespan. Start by cleaning, sanitizing, and storing tools immediately after use. Wash items with warm, soapy water to prevent food residue from hardening, and scrape off any debris before cleaning. To sanitize, boil utensils for five minutes or use a bleach solution (1 tablespoon bleach per gallon of water).
Knives, one of your most important tools, require special care. Keep them sharp using a honing steel or sharpening stone, and store them safely in a knife block or on a magnetic strip to protect the blades and reduce the risk of accidents. For wooden cutting boards, apply mineral oil regularly to prevent cracking and dryness. Cast iron cookware needs to be re-seasoned frequently to avoid rust and maintain its non-stick surface. Stainless steel surfaces should be wiped down regularly to remove grease and food particles, keeping them clean and polished.
Don’t overlook your appliances. Coffee machines should be descaled and cleaned following the manufacturer’s instructions. Inspect pots and pans for loose handles and tighten them as needed. Catching signs of wear early can save you from costly repairs or replacements.
To stay on top of tasks, create a cleaning schedule and track maintenance activities. Store cleaned tools in sanitized plastic or metal containers, and keep glasses and cups upside down to avoid dust buildup. When drying dishes and utensils, let them air-dry on a clean rack to ensure they’re ready for their next use. Consistency in these practices will help maintain a safe and organized kitchen.
sbb-itb-7261261
Workflow and Organization Tips for Culinary Students
Creating a well-organized kitchen isn’t just about having the right gadgets – it’s about arranging them in a way that makes your cooking process seamless. A thoughtfully structured setup can save time, reduce stress, and make your culinary journey far more enjoyable.
Designing an Efficient Workspace
An efficient kitchen begins with dividing your space into zones for specific tasks. Set up areas for prep work, cooking, dishwashing, and storage. This reduces unnecessary back-and-forth and keeps essential tools and ingredients close at hand.
Chef Instructor Luke Shaffer highlights the importance of this strategy:
"The big takeaway is to try to think efficiently. Try to put things together that you use together and store together, so you can move as little as possible and can be as efficient as possible." [6]
Keep frequently used items – like utensils and spices – within arm’s reach of your stove. Clear countertops to maximize your workspace, and consider vertical storage options for items such as cutting boards, baking sheets, and pot lids.
In your pantry, organize items by category. For example, group canned goods together – tomato products in one spot, vegetables in another – so you can quickly see what’s available.
Lastly, plan for food waste by setting up a dedicated container for scraps. If possible, use a small compost bin. This simple step keeps your workspace tidy and limits trips to the trash.
Once your workspace is optimized, the next step is to manage your time effectively and prepare like a pro.
Time Management and Mise en Place
A well-organized kitchen pairs perfectly with the concept of mise en place. This French term, meaning "everything in its place", emphasizes preparing ingredients and tools ahead of time to reduce stress and boost efficiency.
Chef Instructor Tracy DeWitt shares how preparation provides peace of mind:
"I like mise en place. I’m big into preparation. Preparation calms me down because I’m a nervous soul. I get calm when I prepare." [2]
Anthony Bourdain also famously underscored its significance:
"Mise-en-place is the religion of all good line cooks…As a cook, your station, and its condition, its state of readiness, is an extension of your nervous system." [7]
Start by reviewing your recipe and checking your pantry for the ingredients you’ll need. Create a plan that aligns prep times with cooking times. Lay out all your tools and ingredients before you begin, and pre-measure, chop, and slice in the order they’ll be used.
Keep your station tidy by cleaning as you go. Wash prep bowls and utensils immediately after use, and wipe down surfaces regularly. This habit not only keeps your workspace organized but also makes the entire cooking process smoother and more enjoyable.
Additional Items for Culinary Students
If you’re gearing up for culinary school, there are a few extra items that can make your experience smoother and more productive. These essentials not only prepare you for the kitchen but also help you stay organized and ready for the challenges ahead.
Uniform and Personal Safety Gear
Your uniform is more than just a dress code – it’s a critical part of maintaining safety, hygiene, and professionalism in the kitchen. Most culinary programs require a specific uniform, which typically includes a chef’s jacket, chef’s pants, a hat or hair covering, non-slip shoes, and an apron [58, 59]. Pay attention to the details: your shoes should be closed-toe, black, and slip-resistant, and your hair must be fully covered with a hat or hairnet. On top of that, proper hygiene is essential – keep your nails short and clean, skip the nail polish, limit jewelry, and avoid wearing strong fragrances.
Uniform requirements can vary by program, with some schools offering extras like name tags or selling uniform sets through campus bookstores. Make sure to check your program’s guidelines and have your full uniform ready before your first day [58, 59]. A polished and professional appearance not only meets the standards but also sets the tone for your learning and growth.
Notebook and Other Classroom Items
A good notebook is a culinary student’s best friend. Use it to jot down recipes, techniques, and feedback during classes – these notes will be a valuable resource throughout your career. You might even consider keeping a food diary to document details like ingredient weights and your thoughts on each dish you prepare. This practice can help you fine-tune your skills and develop consistency in your cooking [8].
Many chefs rely on tools like small notebooks, address books, or digital platforms like Google Docs to organize their recipes [9]. Find a method that works for you and stick with it. A well-organized system makes it easier to refer back to your notes when you need them [10]. And don’t forget the basics – always have reliable pens and backup supplies on hand. Over time, your notes can evolve into a personal cookbook and an invaluable resource.
Starting strong with good habits and a professional mindset can make all the difference. As Chef Luke Shaffer, an Escoffier Culinary Arts Instructor, puts it:
"When I was hiring new line cooks, I would say, ‘I can teach you how to cook. I can’t teach you how to show up early and be excited to be here. That’s what we got out of Escoffier students.’" [11]
A positive attitude and solid organizational skills will not only help you succeed in culinary school but will also serve you well in your career beyond the classroom.
Conclusion: Preparing for Culinary Success
The secret to thriving in the culinary world lies in being well-prepared and organized. With the right tools, efficient systems, and disciplined habits, you can focus on honing your craft without distractions.
Being organized in the kitchen isn’t just about convenience – it’s about working smarter. A well-structured setup streamlines everything from chopping to plating, saving time and energy along the way [1]. It also minimizes risks, as a clutter-free workspace reduces accidents and injuries [1]. Plus, staying organized helps you avoid waste and costly mistakes, like realizing you’re missing a vital ingredient halfway through a recipe [1].
Chef Thomas Keller famously said:
"Mise en place is all good line cooks’ faith. Do it right or suffer." [12]
This philosophy – having everything in its place before you begin – becomes second nature with practice. A clean and orderly kitchen doesn’t just help you think clearly; it also prepares you to handle surprises during service with confidence [12]. Over time, this habit will set you apart, giving you the edge needed to succeed in the high-pressure culinary world.
Investing in quality tools and setting up functional systems now will pay off throughout your career. More than that, it builds the discipline and professionalism that distinguish chefs from casual cooks [14].
To maximize efficiency, consider creating defined zones for prep, cooking, cleaning, and storage [13]. Keep your most-used tools and ingredients within easy reach to maintain a seamless workflow [1].
FAQs
What are the must-have kitchen tools for starting culinary school?
As a budding culinary student, having the right tools can make all the difference in setting yourself up for success in the kitchen. Start with the basics: a chef’s knife, a paring knife, and a boning knife. These three essentials will handle most of your cutting and slicing tasks with ease. Add a sturdy cutting board and a set of stainless steel mixing bowls to your arsenal for prepping ingredients efficiently.
To round out your toolkit, include a silicone spatula, a wooden spoon, a vegetable peeler, a fish spatula, and a digital kitchen scale for accurate measurements. These tools are not only versatile and durable but also staples in both professional and home kitchens, ensuring you’re well-equipped as you dive into your culinary education.
What’s the best way to organize my kitchen workspace for efficiency and safety?
To create a kitchen workspace that’s both efficient and safe, start by organizing dedicated zones for specific tasks like food prep, cooking, cleaning, and storage. Keep the tools and ingredients you use most often within arm’s reach to cut down on unnecessary movement. For instance, store knives close to your prep area and keep pots and pans near the stove for easy access.
Maximize your space by incorporating vertical storage solutions. Think shelves, hooks, or magnetic strips for utensils. Group similar items together – like spices, baking tools, or cutting boards – and use labeled containers to maintain order. This approach not only saves time but also makes cooking less stressful, especially when things get hectic.
Safety is just as important. Keep walkways clear and store heavy or sharp items in secure, easily accessible spots. Avoid placing breakable or hazardous items, such as knives or glass jars, on high shelves where they could fall. A well-organized kitchen doesn’t just streamline your workflow – it also minimizes the risk of accidents, letting you focus on perfecting your recipes.
How can I take care of my kitchen tools and equipment to make them last longer?
Proper care for your kitchen tools and equipment isn’t just about keeping them clean – it’s about making sure they last for years to come. Start by giving them a thorough cleaning after every use. For appliances like your refrigerator, make it a habit to defrost regularly and clean the condenser coils. This helps them run smoothly and efficiently. And don’t forget to check your tools occasionally for any signs of wear or damage.
When it comes to storage, organization is key. Use knife guards, utensil holders, or dedicated storage spaces to keep everything safe and prevent unnecessary damage. Be mindful not to overwork your equipment or push it beyond what it’s designed to handle – doing so can lead to early wear and tear. If you notice any small issues, tackle repairs right away to avoid bigger problems down the road. With regular care and attention, your kitchen tools will stay in top-notch condition for years.